Section 1: Calculating the material you will need
- Measure the artwork you are going to frame. Enter the measurements below:
Side A. [ ] Side B. [ ] - Add 4 inches to each side. Enter the measurements below:
Side A + 4”= [ ] Side B + 4”= [ ] - Determine the width and depth of the frame itself. See illustration:
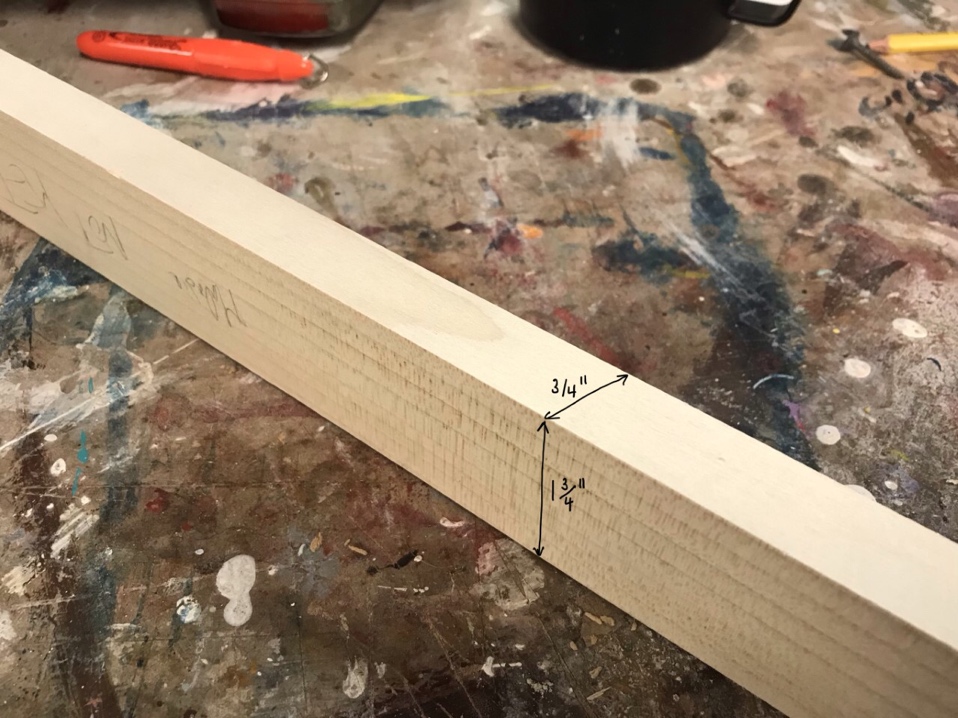
Enter measurements:
Face: [ ] Side: [ ]
- Measurement of the face [ ] X4 = [ ] 1” = [ ]
This is the minimum width of the material you purchase. - The thickness of the wood will be 8/4 (pronounced eight quarter). This is a measurement used for hardwood. It simply means the wood is 2” (approximately) thick.
- Enter the thickness (8/4), the longest measurement from step 2 and the total from step 4.
[ 8/4 ] Step 2. [ ] Step 4. [ ]
This will be the size of the material you will purchase. You will most likely have leftover material.
Section 2: Preparing the material
- After purchasing your material you will notice one side of the material is cut clean and the other is fairly rough. This is normal for hardwood. See illustration:
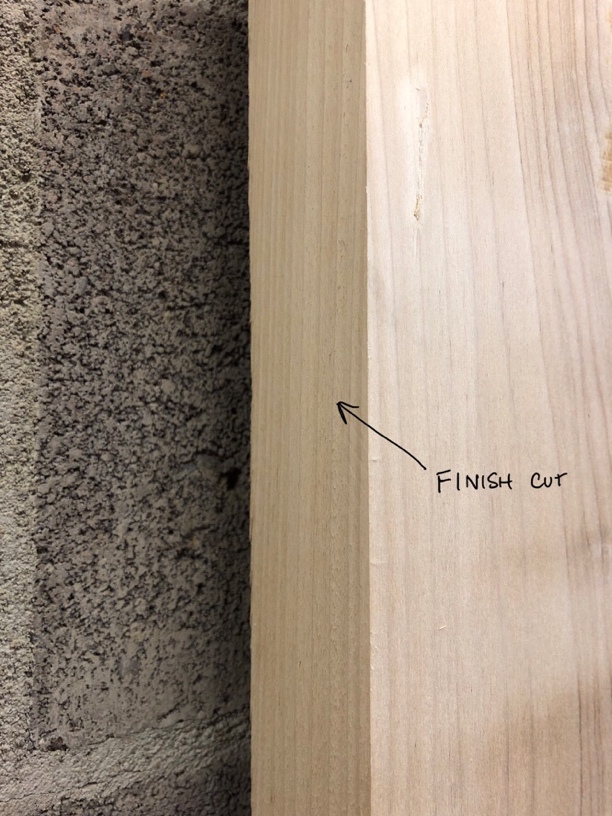
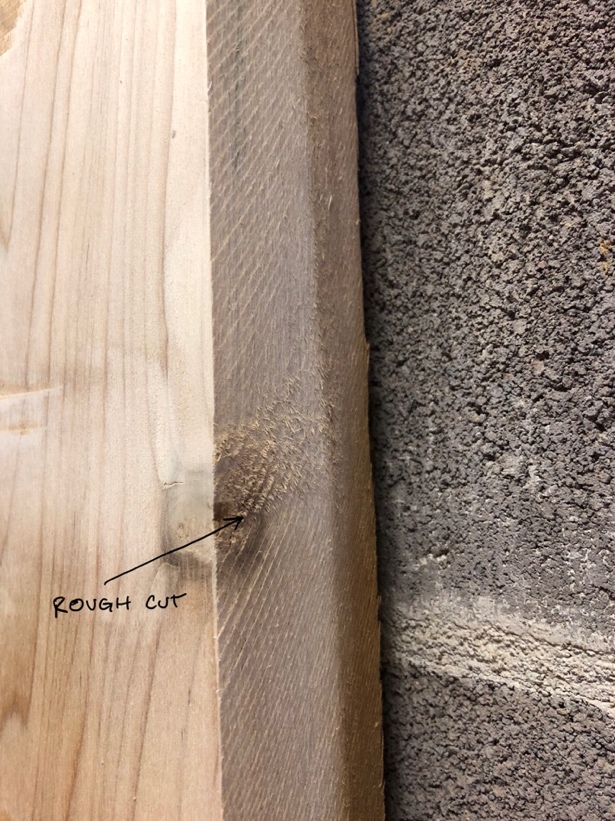
- Use a jointer to clean up the finish cut edge a little more. If you do not have a jointer you can use a table saw. If you have a jointer skip to Section 3.
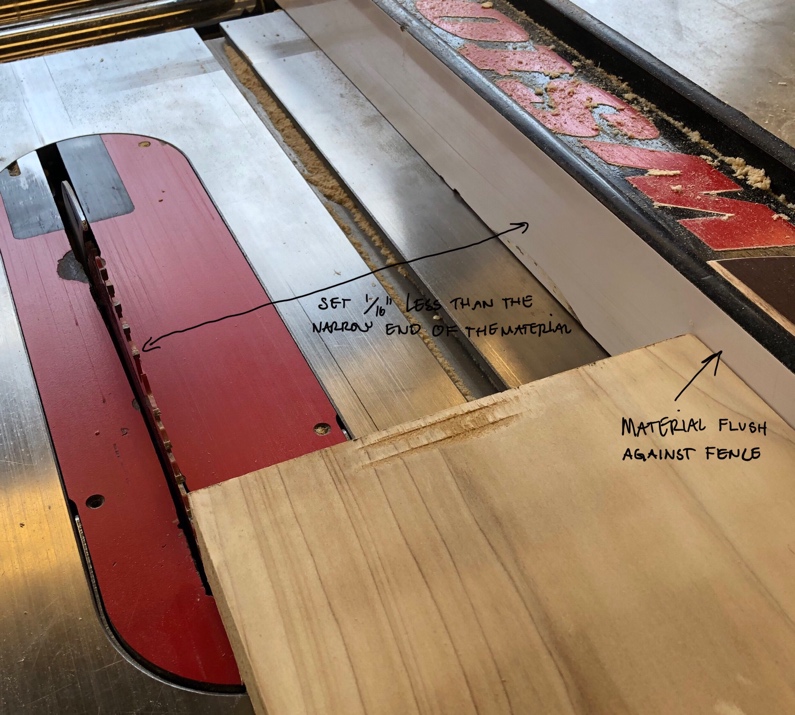
- Measure both ends (the rough cut edge is not usually parallel to the finish cut edge) and set the fence 1/16” of an inch less than the narrower end. See illustration:
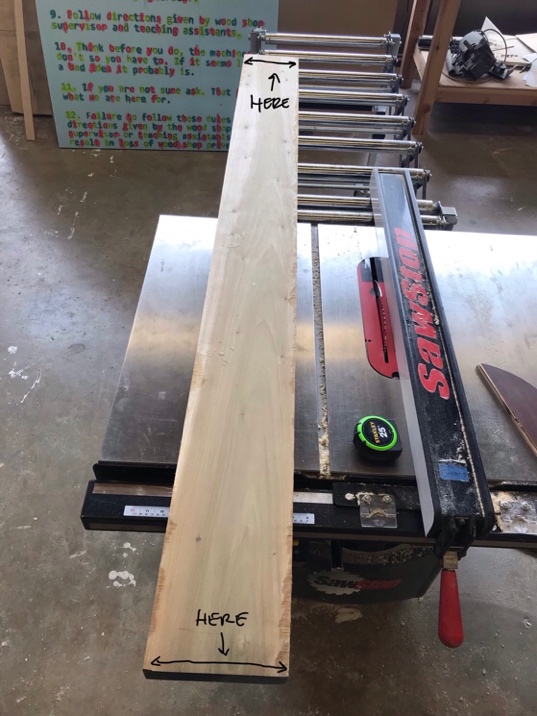
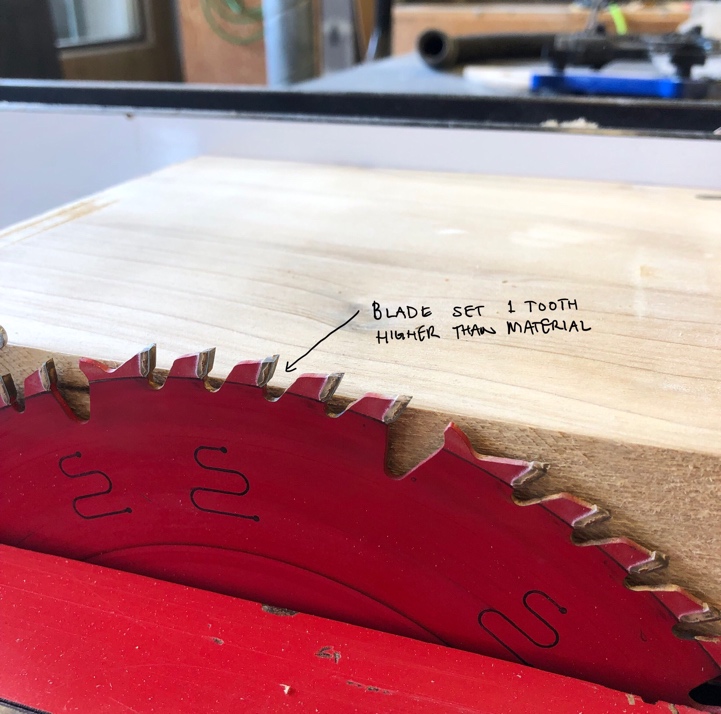
- With the table saw blade raised to a tooth height above your material, the blade set 90° to the table and with the finish cut side against the fence, keep your material as flush as possible with the fence as you make your cut. See illustration:
- Flip your material and repeat the cut subtracting another 1/16” on the finish cut side. You should now have two clean parallel sides to your material.
Section 3: Cutting frame sides
Now you will need to cut the blanks for the 4 sides of your frames. You should have decided on the width of your frames in step #3 before purchasing material.
- Set the fence on the table saw to the thickness you want your frame to be.
(Note: Gallery frames usually range between 5/8” to 1”. Any thinner and the frame will not be structurally sound and any thicker and it could overwhelm your work.) - Cutting a narrow measurement can be dangerous so follow these steps to help ensure a safe cut:
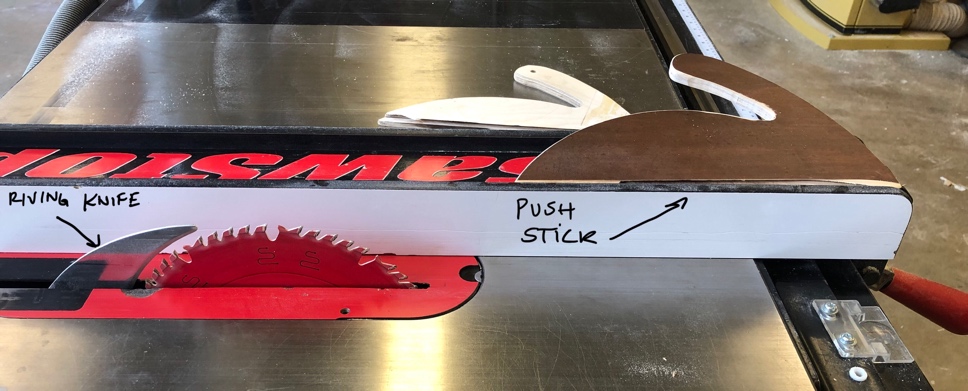
- Make sure the riving knife is installed behind the blade and you have a push stick ready.
- continued…
- Make sure the blade is sharp and clean
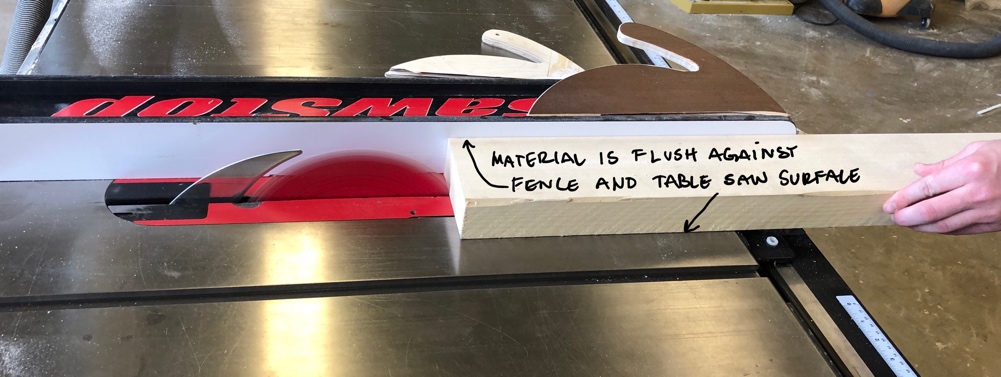
- Keep your material flush against the fence and the surface of the table saw. Use a feather board if you have one. This will help keep the material tight against the fence. (Make sure to adjust the feather board after each cut)
- continued…
- Push the material through at a consistent speed and once your material is completely on the table finish cut using a push stick.
- Repeat step d until you have all 4 sides of your frame.
Section 4: Cutting the Pocket
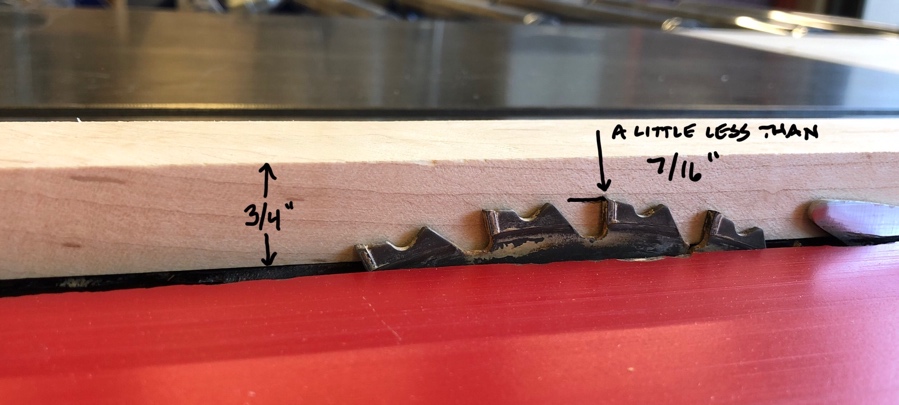
- Set your table saw’s blade height to a little more than half of the thickness of the front face of your material. This frame is ¾” so we will set it a little less than 7/16”.
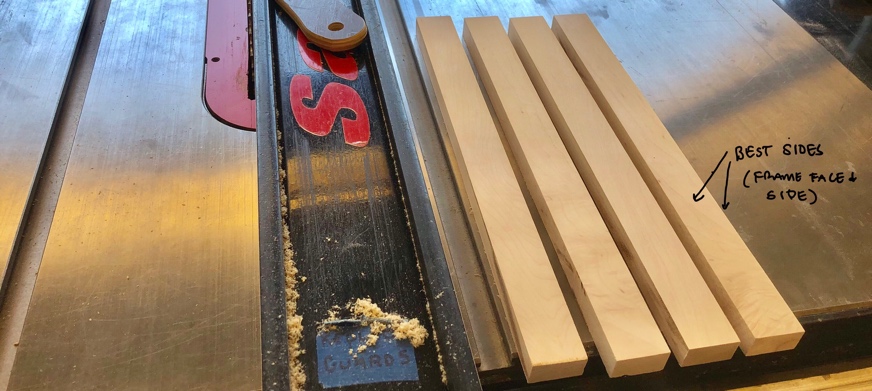
- On each length of your frame find the best front face and outside face. Position your material so what will be the front face is on your right (so it will be against the fence when cut) and the side face is up.
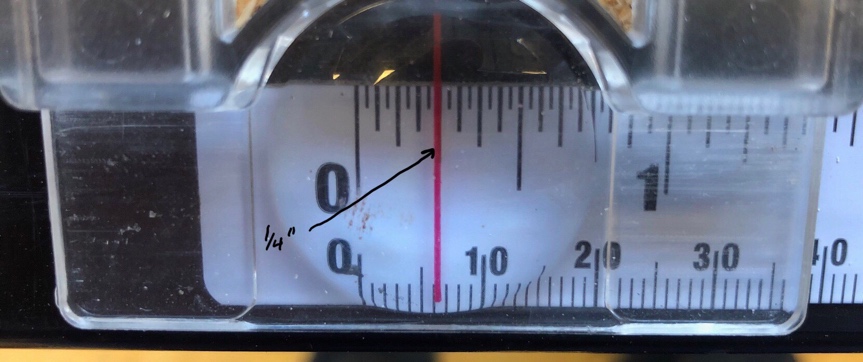
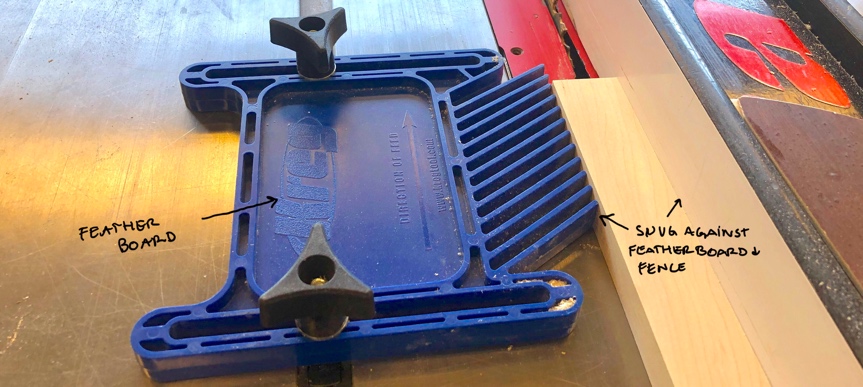
- Set your table saw’s fence to ¼” and using a feather board to keep the material against the fence run all 4 sides of your frame through the table saw. This cut WILL NOT cut all the way through the material but will make a groove.
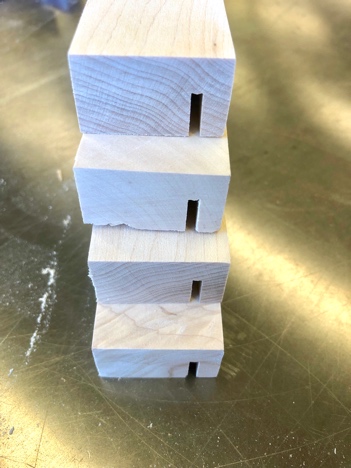
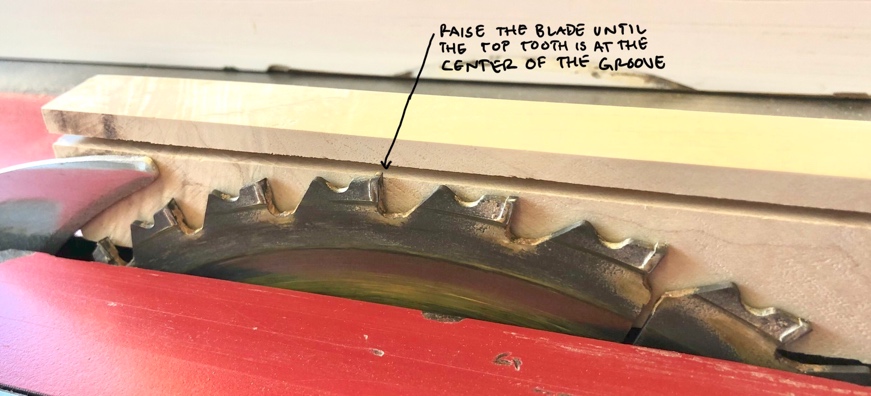
- Now position one of your frame sides with the front face up and the groove to the left against the table saw blade. Raise the table saw blade so the highest tooth is about in the center of the groove you just cut.
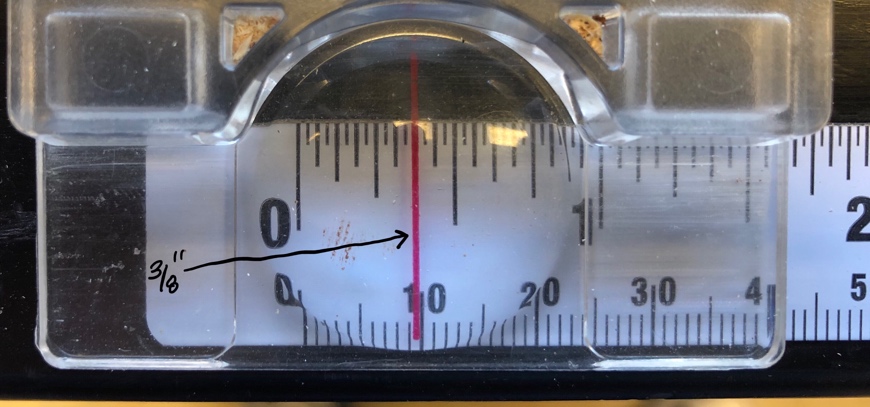
- Now set your fence to the thickness you want the outside wall of the frame. In this case we will set the fence to 3/8”. 3/8” should be the minimum for any frame larger than 8 ½” x 11”. Any thinner and problems could arise later in putting the frame together and preparing it to hang on the wall.
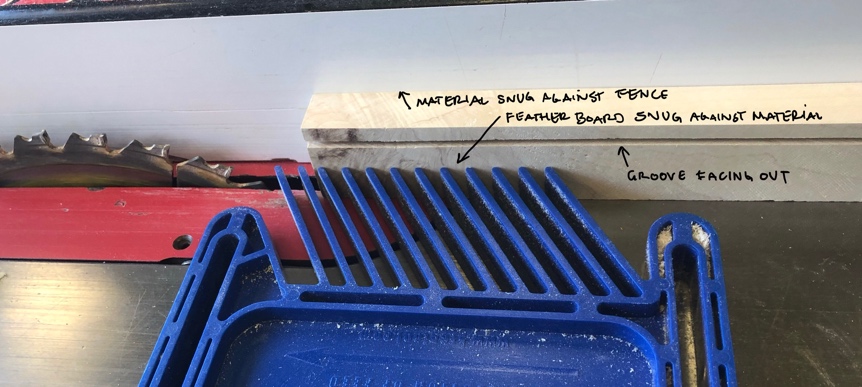
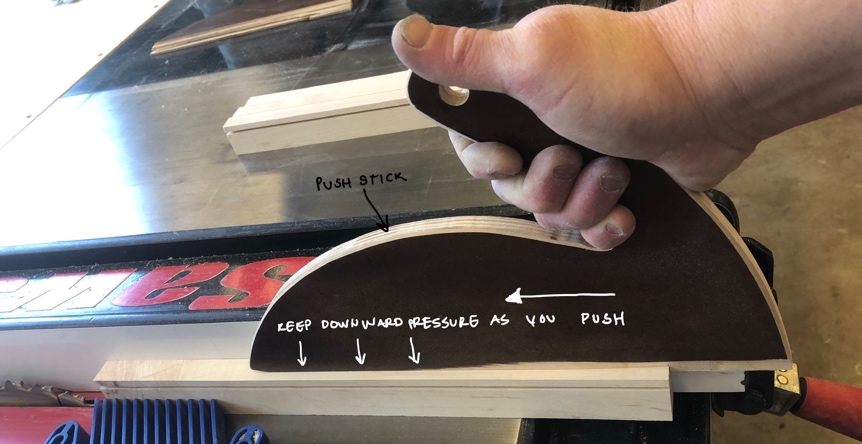
- With the side face against the fence and the groove facing the blade run all the sides through the table saw. Use a feather board to help keep the material tight against the fence and try to keep the material as flat against the bed of the table saw as possible. On this cut, material with sides longer than 12-14 inches tend to ride up on the saw blade. Use the type of push stick in the illustration and keep good downward pressure as you cut. If possible have another person use a long thin stick to hold down the wood as you push it through to prevent this.
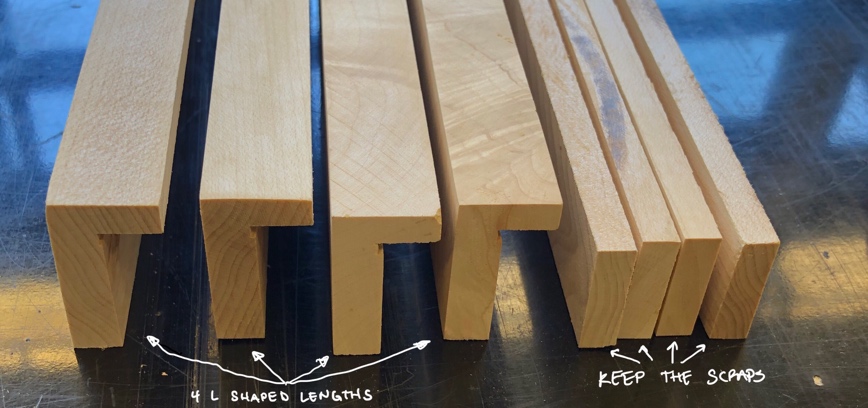
- You should now have 4 sides of your frame shaped like an L and a long thin piece of waste material. Keep this waste material as you can use it to make spacers later.
Section 5: Measuring and Cutting Miters
- Measure your artwork or mat board and write down the height and the width and add 1/8”
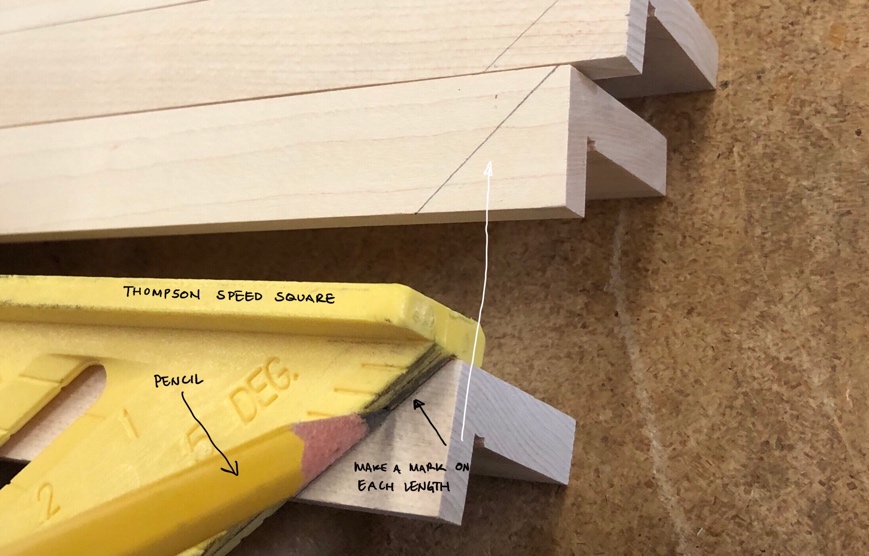
Height: [ ] + 1/8” = [ ] . Width: [ ] + 1/8” = [ ] . - Now take all of your frame sides and on ONE end use a Thompson Speed Square and with a pencil mark a 45° line as close to the end of the side as possible.
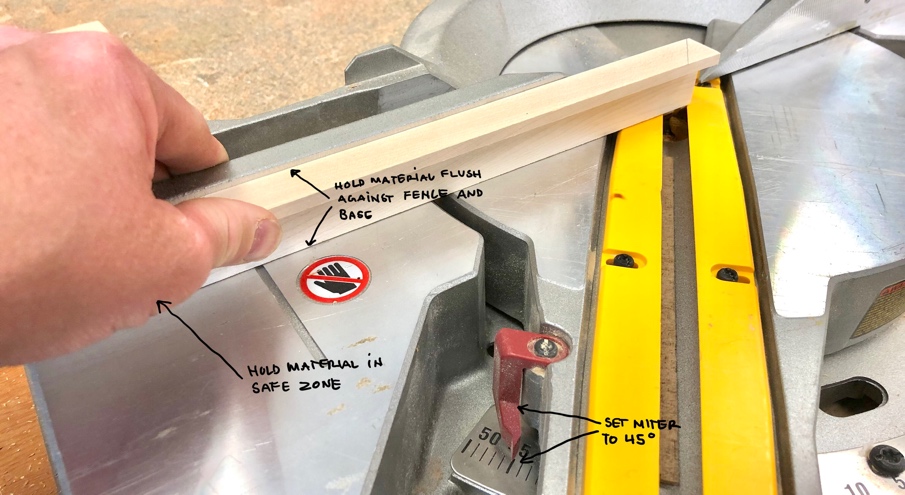
- Set your miter saw to 45°. Before you make your cuts make sure your material is flat and tight against the base and back of the miter saw and that you are holding the material within the safe zone of the saw.
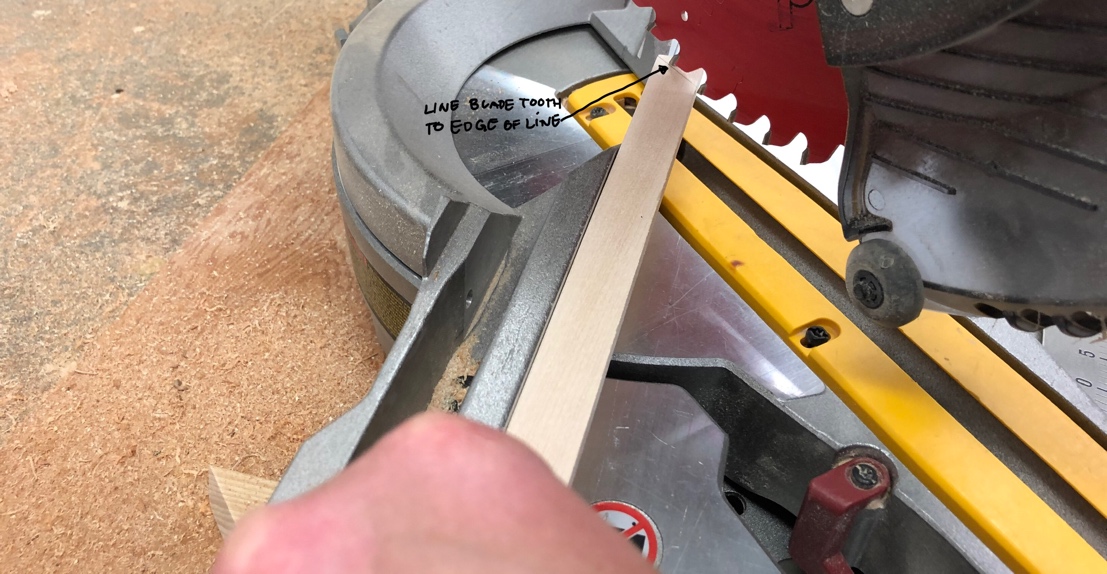
- Line the edge of the blade up with the line on each length then make your cuts. Repeat on each frame length. Remember only cut ONE end of each length at this point and follow all shop safety rules for the miter saw.
- Take one of the longer sides (for this frame 11” + 1/8” = 11 1/8”) and measure from the inside edge of the first 45º cut and using the measurements from step 1, make a mark (see illustration) as close to the back edge as possible.
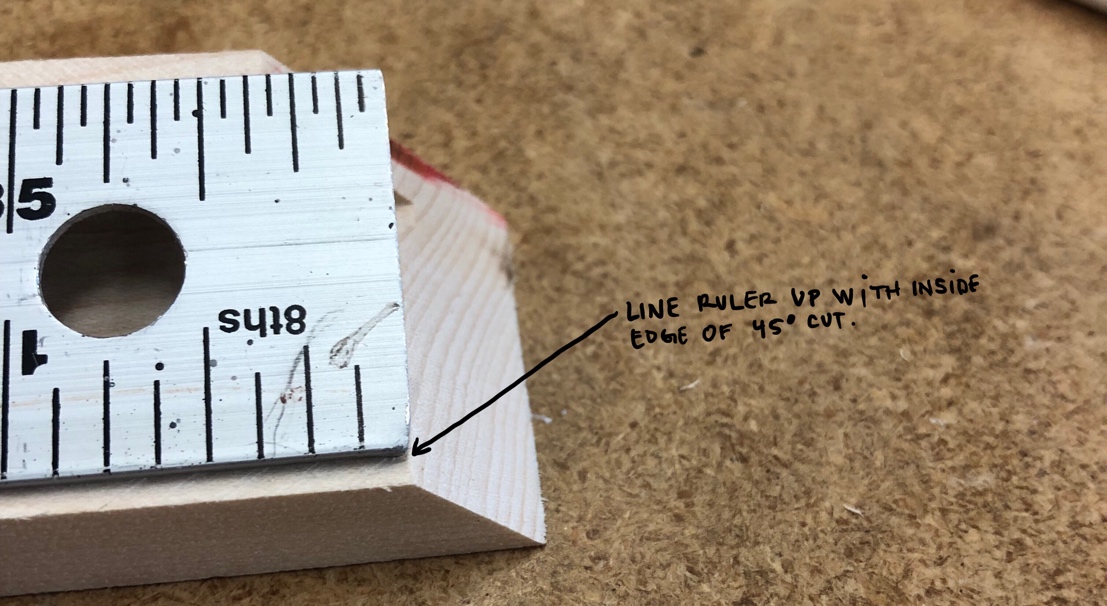
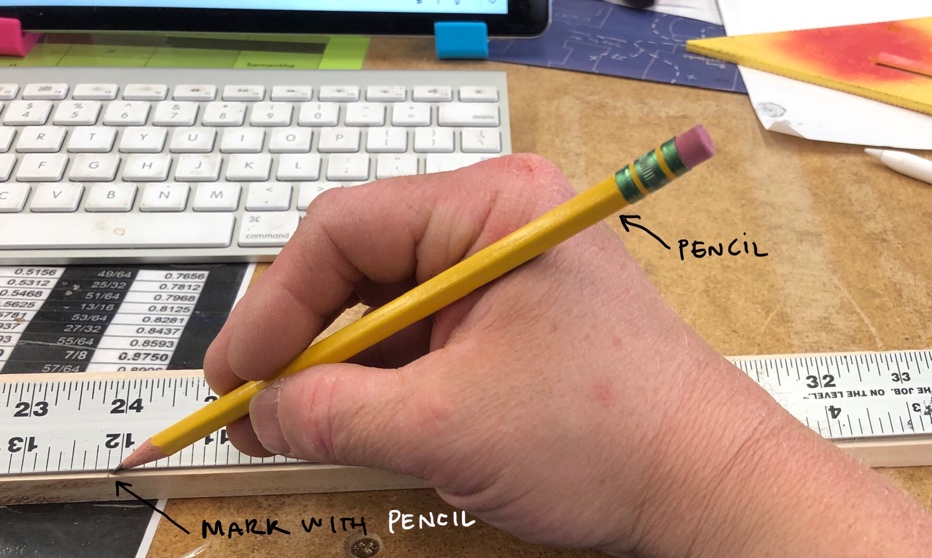
- Using the Speed Square again make a 45º line on the back side of your frame using the mark as your starting point (see illustration).
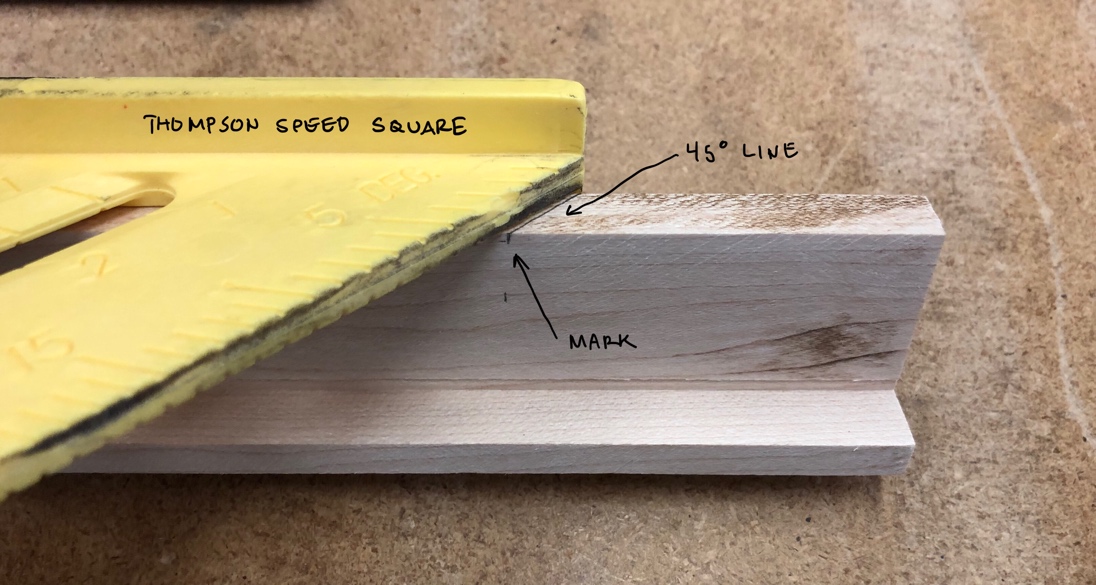
- Now set the miter saw so the blade lines up with the 45° mark. Make the cut slow and steady to avoid splintering.
- Use the frame side with both ends cut to 45° as a template – line the two 45° angles up so they are flush and back to back and mark the uncut end of the second side (see illustration).
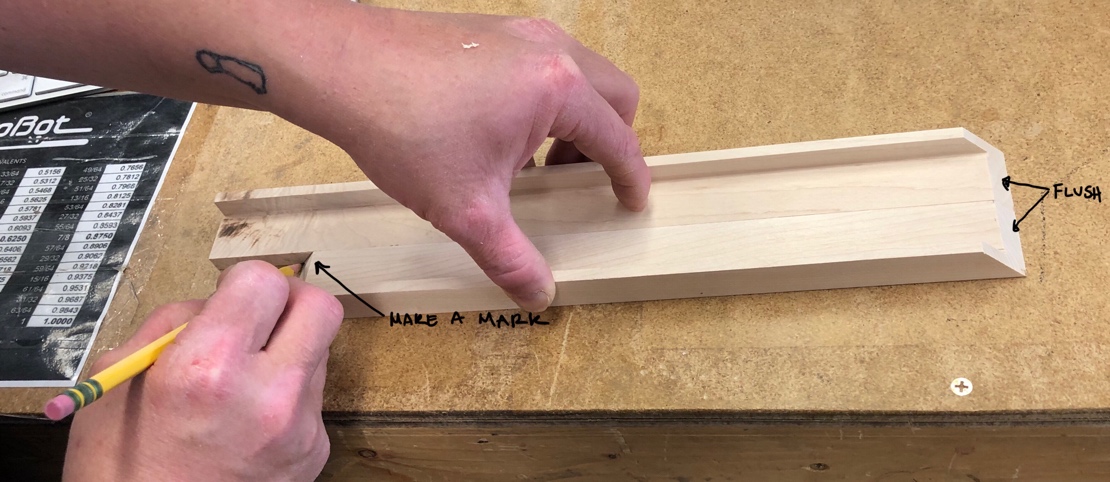
- Line up the miter saw blade with the line and make your cut. You should now have the two longer sides of your frame with both ends cut to 45º.
- Stand both sides up on a flat surface with the outsides of the frame together. The points of the 45º cut should line up (see illustration).
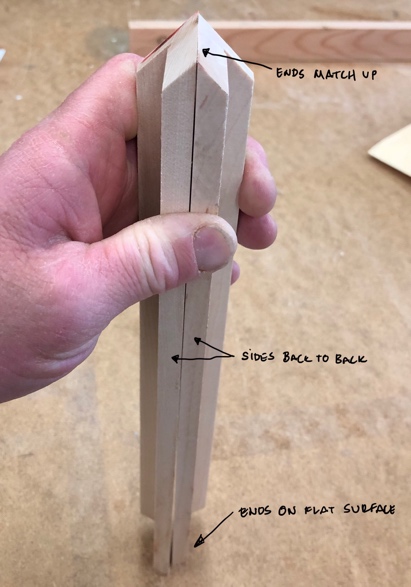
- If they do not match up, skim just a little off the longer of the two until they are the same. It’s better to skim off not enough than too much and It’s ok if they are not “exactly” the same.
- Repeat the process for the shorter lengths. It is important that the two longer sides and shorter sides are approximately the same length so be sure to double check and make the appropriate adjustments.
Section 6: Assembling the Frame
- Arrange all of your sides to make sure the lengths are the same length and all of your cuts fit together tight. Remove all the feet from a Bessey strap and place strap loosely around your unglued frame. (See Illustrations)
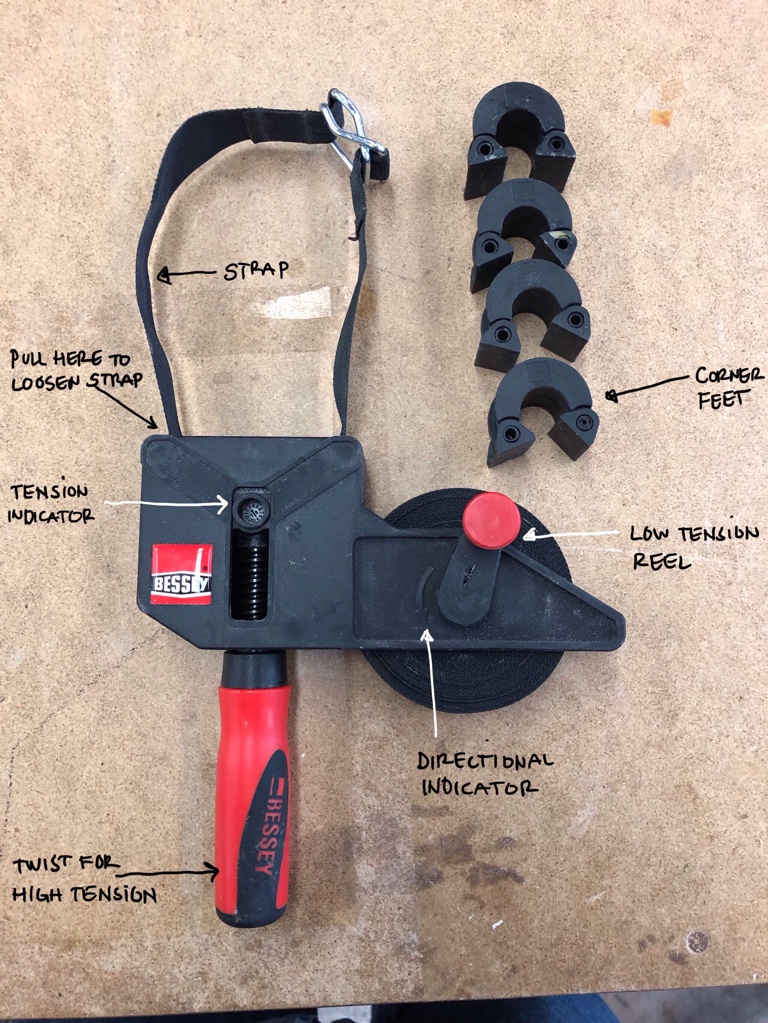
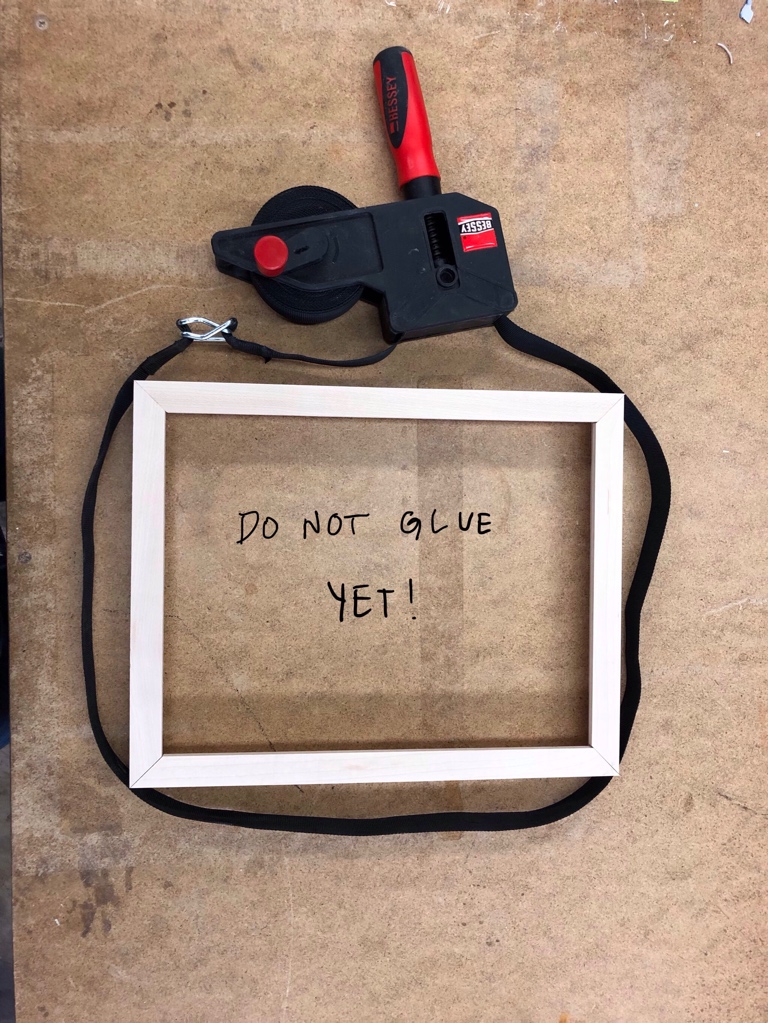
- Replace feet, threading strap under tabs on the back and one for each corner. Make sure feet are flat against material.
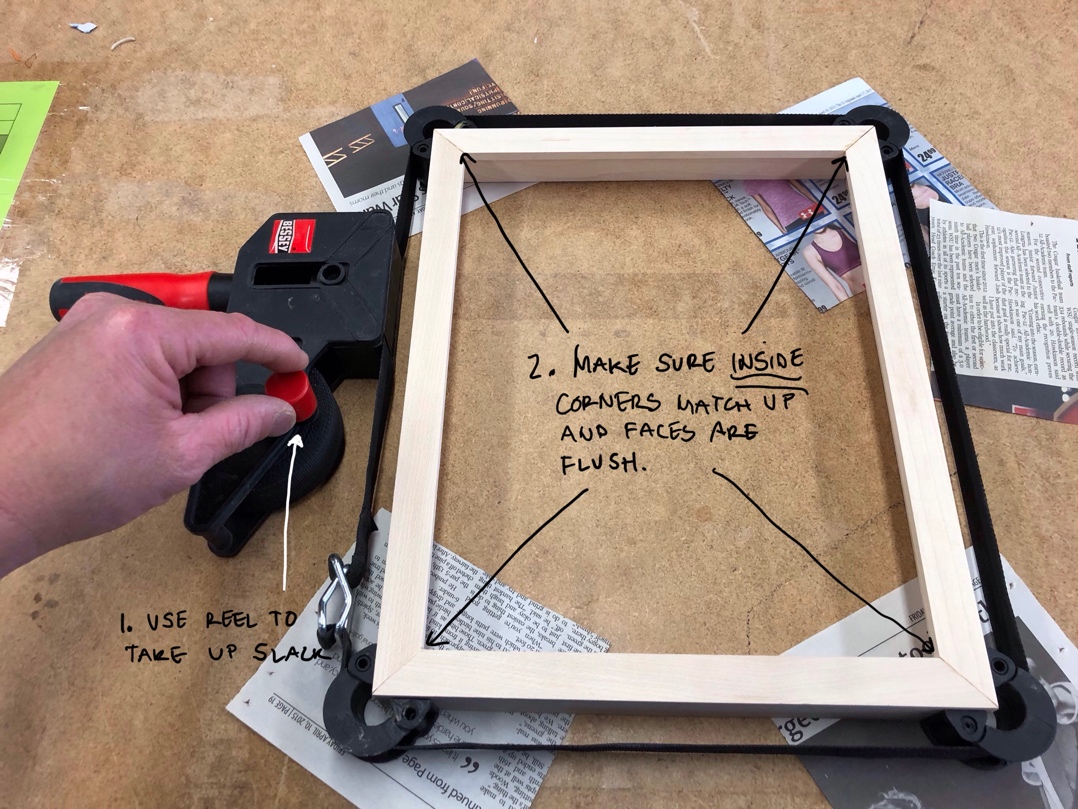
- Reel in any excess slack in the strap with the low tension reel. Do not tighten the strap too much yet. Put newspaper under your corners to keep from gluing your frame to the table.
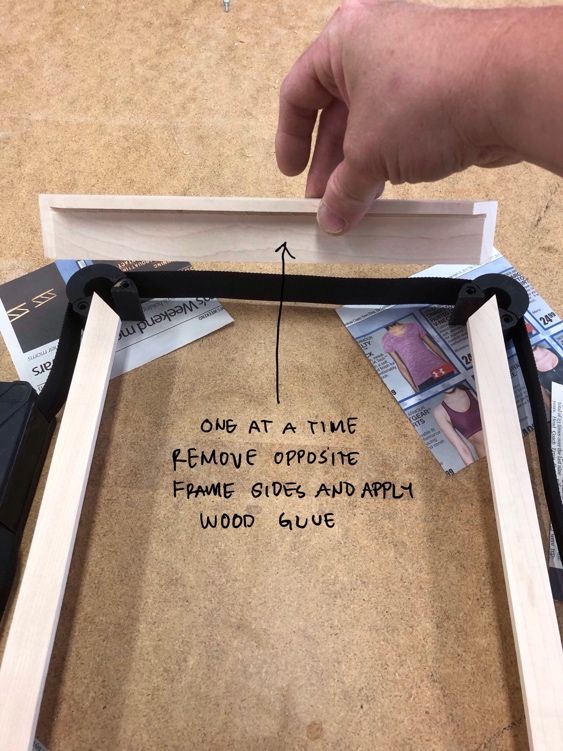
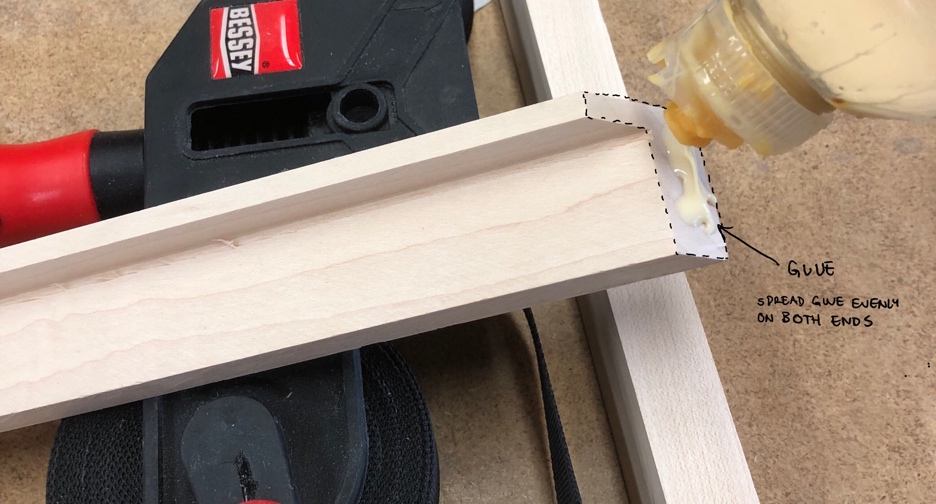
- Remove two opposite sides (doesn’t matter which) one at a time and add wood glue. Spread the glue evenly on each 45° end and spread evenly with brush or finger (fingers are easier to clean) then replace the side making sure the feet are still flat against the material. Do not use Elmer’s white glue.
- Now turn the low tension reel until all the slack is taken in and then arrange the sides so the inside of the corners match and the faces are flush.
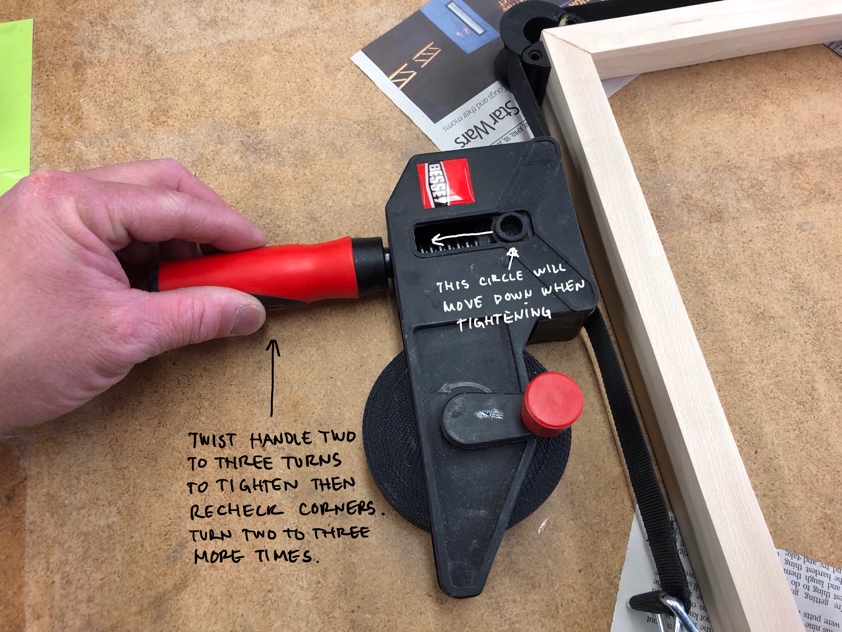
- Twist the high tension handle to tighten twisting about two to three twists (not quite a half rotation for each twist). Recheck to make sure the inside corners match and the faces are flush. Don’t worry about the back of the frame, only the front. Twist the high tension handle two to three more twists and recheck corners one last time.
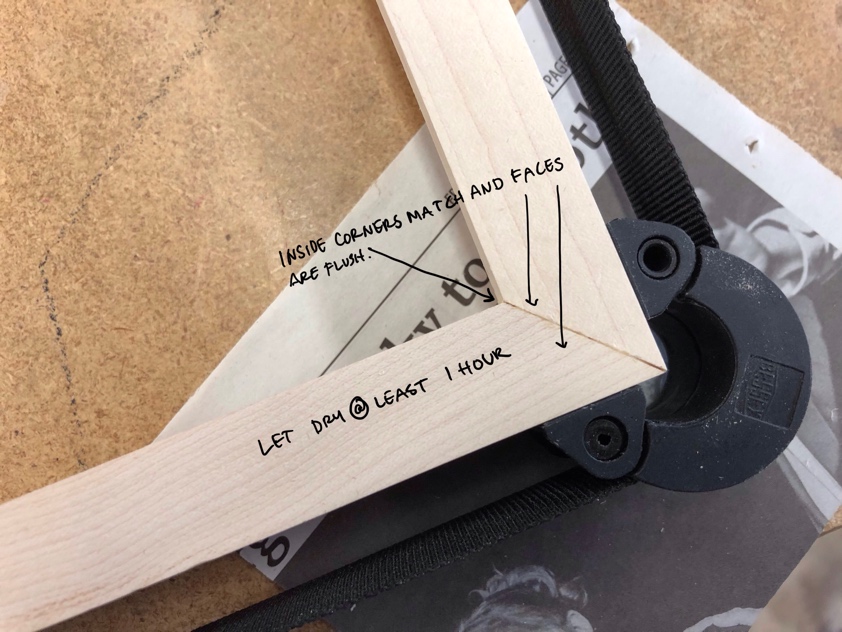
- Wipe off any excess glue and let dry for an hour before removing strap. Full cure for wood glue is 24 hours.
- As a final step v-nails can be added to the back of the frame to increase strength.